
|
 |
||||
Last week I ordered the incorrect gasket which goes between the fuel pump and the accessory case. Today it came (LYCOMING FUEL PUMP GASKET p/n 60096 ) and I was able to work on reinstalling the pump. The first trick is to use some thin safety wire to hold up the plunger. 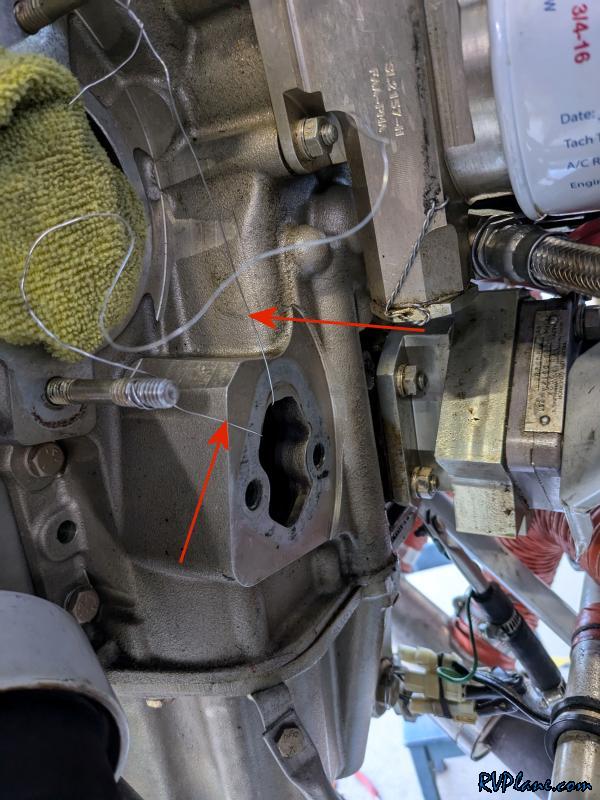 It doesn't require much tension to keep the plunger up. As soon as the fuel pump is installed, and while it's screwed in, but not fully seated, the safety wire easily comes out. 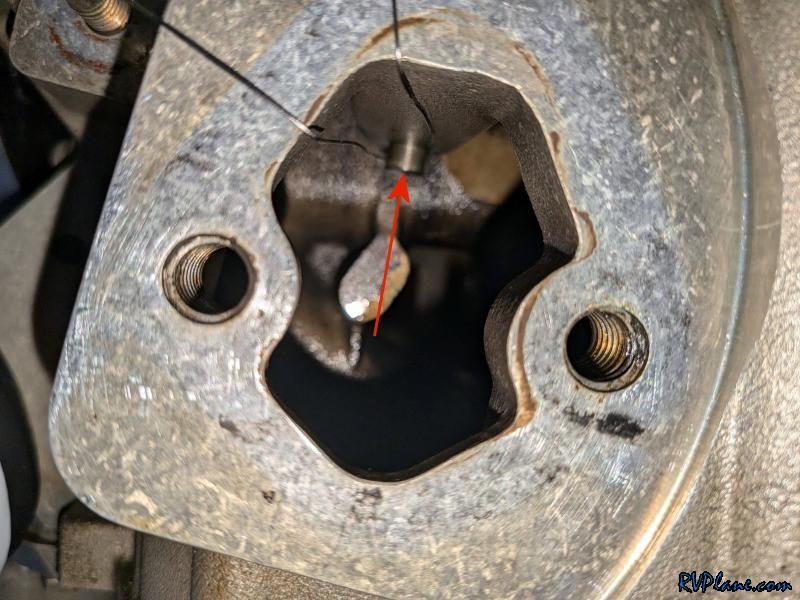 Voila. This was a pretty easy job once I knew all of the tricks (like every job, right??). 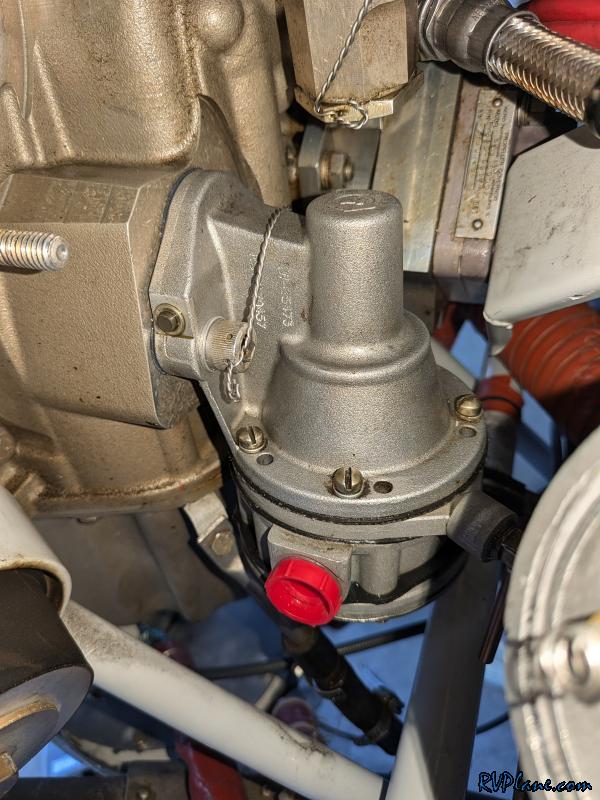 I tweaked the F OVERFLOW PLUG too much and broke it off right at the solder joint. 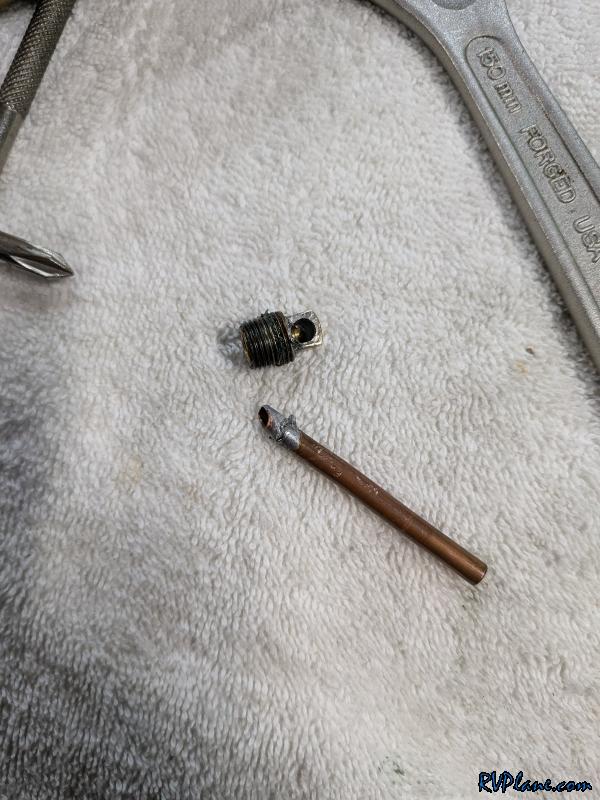 This can be purchased from Van's here: F OVERFLOW PLUG 1/8". About $12. 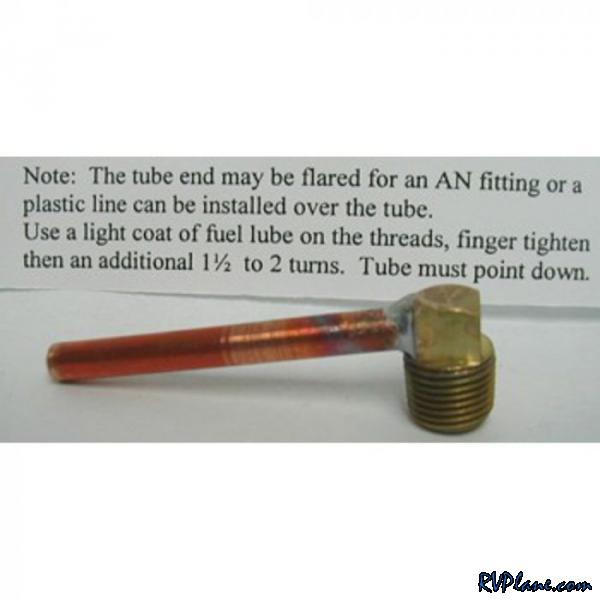 The oil filler tube gasket I made from Home Depot gasket material wasn't looking so good - amazingly enough it wasn't leaking!  While I was ordering items from ACS, I decided to order a silicon dipstick tube gasket - REAL Gaskets RG-72059.  I was really surprised how well the original gasket looked! 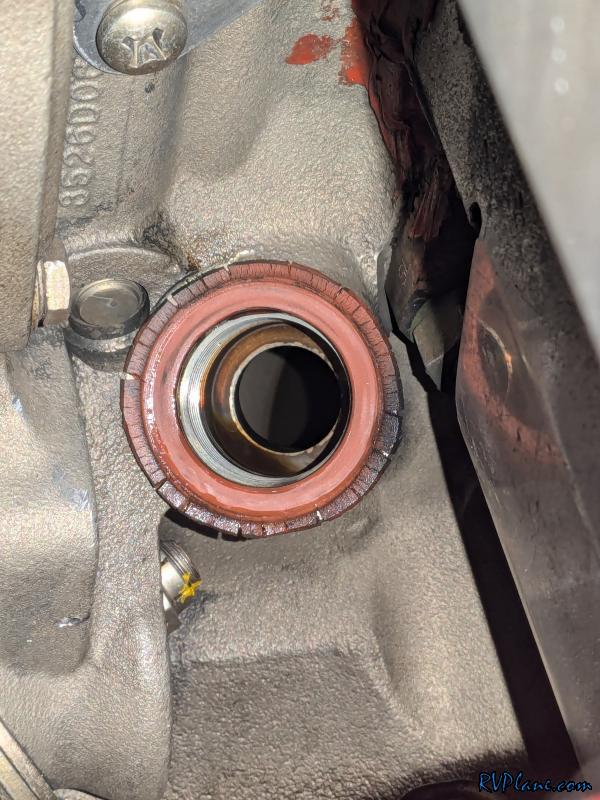 If you're in a bind, this is the material I used for the old gasket from Home Depot - Everbilt 6 in. x 6 in. x 1/8 in. Rubber-Packaging Sheets (2-Pack). Internet # 318763518, Model # 865650, Store SKU # 1006959193. Link: https://www.homedepot.com/p/Everbilt-6-in-x-6-in-x-1-8-in-Rubber-Packaging-Sheets-2-Pack-865650/318763518  Pretty easy job, looks much better.  When I got home I cleaned up all of the joints of the overflow plug, added some flux and hit it with my MAP gas torch. Added a little solder to it and it seems good as new! 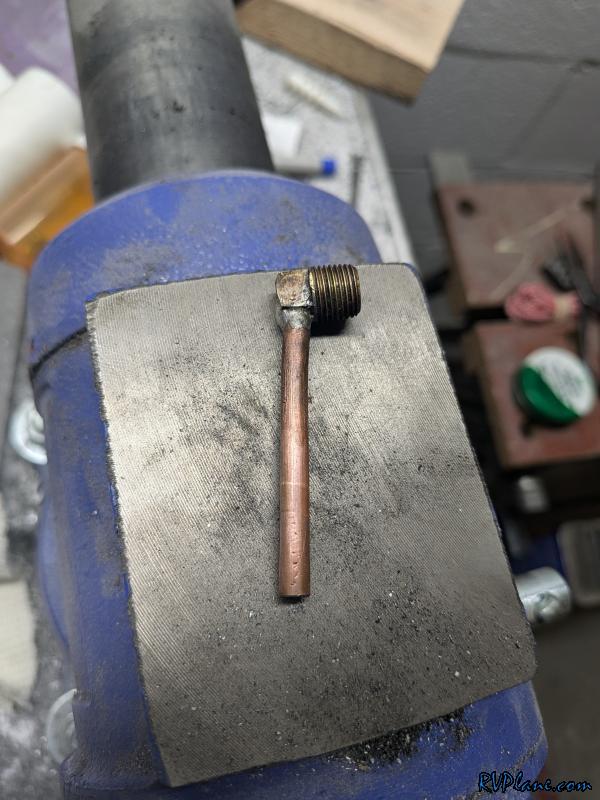
|
|||||
|
http://RVplane.com |
Last Modified: January 31, 2026 |