
|
 |
||||
Over the last couple of days I went through a lot of thought with how to proceed with my exhaust valve issue. The extreme was replacing the cylinder. The intermediate thought was having the guides redone - both required pulling the cylinder. Since I really had nothing to loose, I looked into lapping the valve in place after reaming out the exhaust guide. Worst case is I would still be in the position of yanking the jug. Best case is I could maybe fix the issue. What is lapping the valve? Lapping the valve is a process of carefully placing grinding compound on the seat of the valve, and then spinning the valve with a drill to create a smooth mating surface. Mike Busch of Savvy Aviator has a great video describing this process in details with excellent HD video from a borescope inside the cylinder: https://www.youtube.com/watch?v=71cMqxZtgAs In his video he needed a few items to perform this job:
One of the main differences my approach took was instead of trying to apply the grinding paste through the spark plug hole using a borescope to guide me, I decided to apply it to the valve mating face through the exhaust port. I did this for a number of reasons. First my exhaust was already dropped. Second - the access was much better - I could see the area I needed to apply the paste to without needing a borescope. And finally, less chance of accidentally introducing the grinding paste to the inside of the cylinder. Working with an angled swab and a borescope is not really obvious - it's sort of like the first time you back up a vehicle with a trailer on it. You think it's going to turn one way, when in fact it turns the other way! There has been some criticism of lapping exhaust valves - mainly with introducing grinding contaminates to the combustion chamber. I was also concerned with this. Once I received the Chemico grinding compound and looked at it's consistency, my worries were quickly reduced. The paste is very oily and didn't seem unwieldy like it would spread all over the place. Secondly, since I was applying it through the exhaust port, I had great control of how far into the engine it would go. And lastly. I used SO LITTLE OF IT I doubt it would cause major ring wear. Most likely it would be blown out of the engine. And like I mentioned in the first part - I have nothing to loose with performing this procedure! For $25 in parts for the grinding compound and swabs it was a no-brainer decision to try! I took a few photos of the #2 exhaust valve before I attempted to lap the valves or clean the valve guides. The exhaust valve looks to have a nice even burn radius to it - no concentration of heat to any part of the perimeter.  The mating surface on the cylinder head certainly didn't look perfect with some slight build up. Perhaps this is lead? I dont know of any other potential solid contaminate that could end up here. 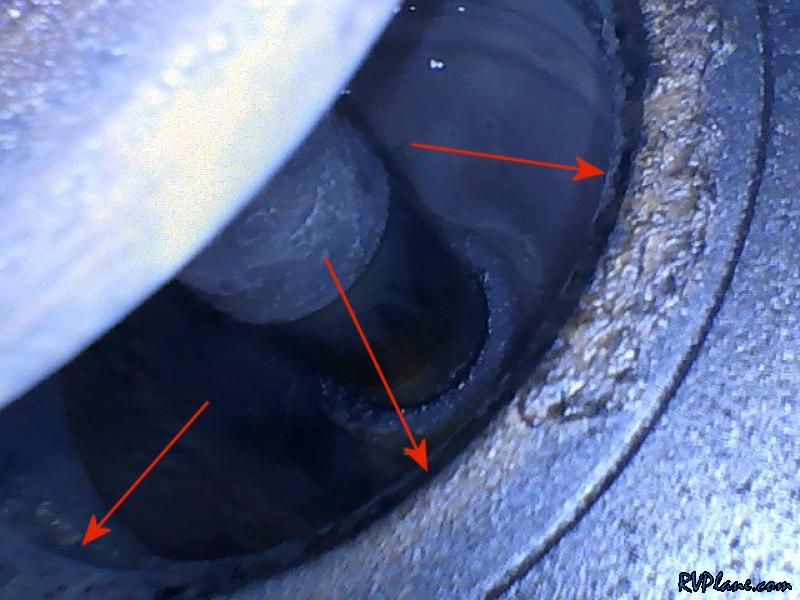 A slightly better shot. With the Vividia Ablescope VA-400 borescope, you don't always get the best pictures. Sometimes they are great for a brief moment and then fade. Anyways, you can see more buildup photos. 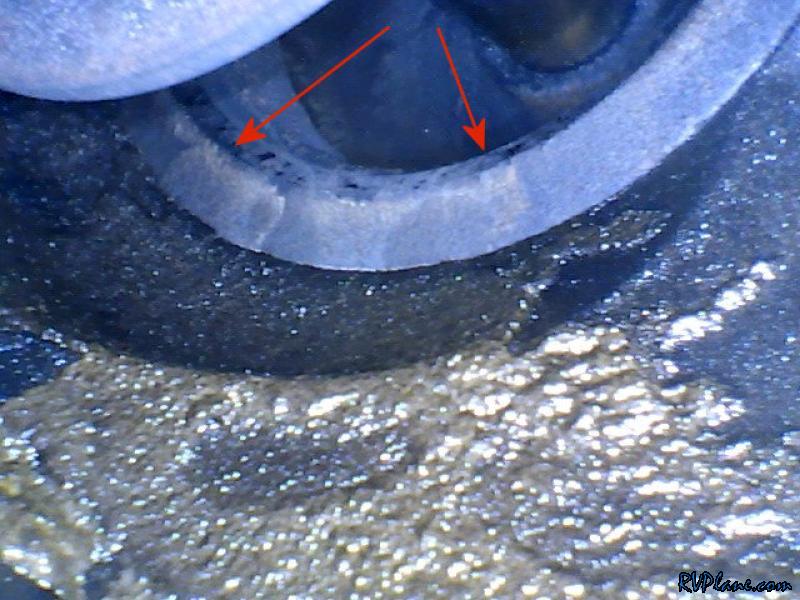 I won't go into too much detail on reaming the exhaust valve guide as I have plenty of other documentation and an article in Kitplanes (https://www.kitplanes.com/fixing-a-sticking-valve/). The valve guide wasn't all that clogged up - I have experienced much worse cleaning other guides. 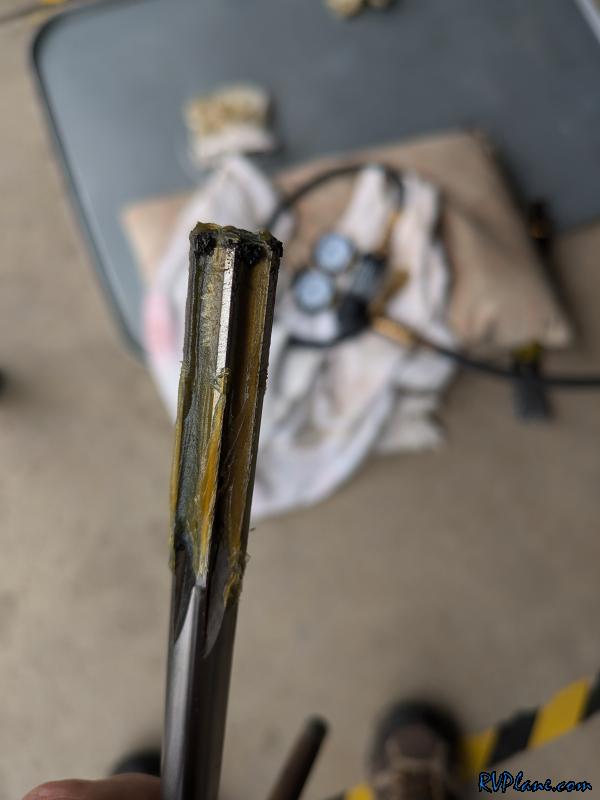 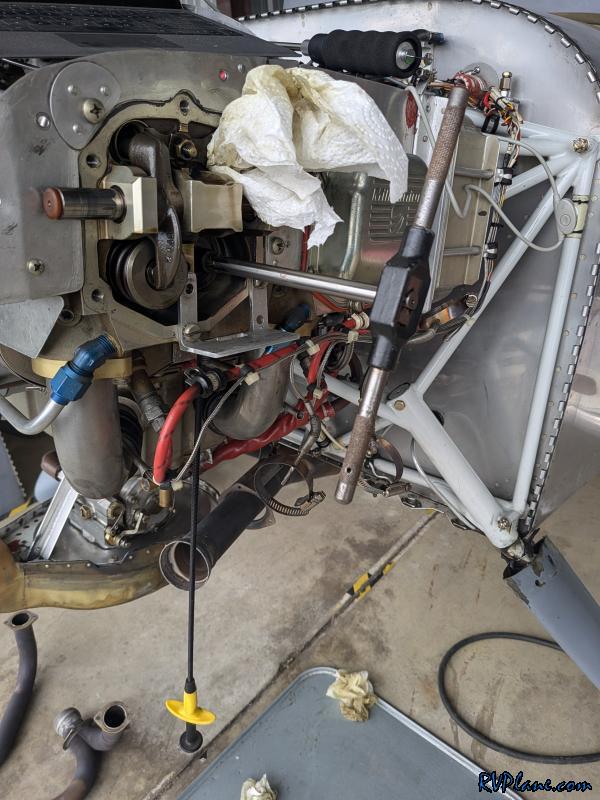 These foam swabs from Amazon are great. Way more thorough than q-tips. Worked great to use solvent to clean the residue from the guide and also oil the guide. 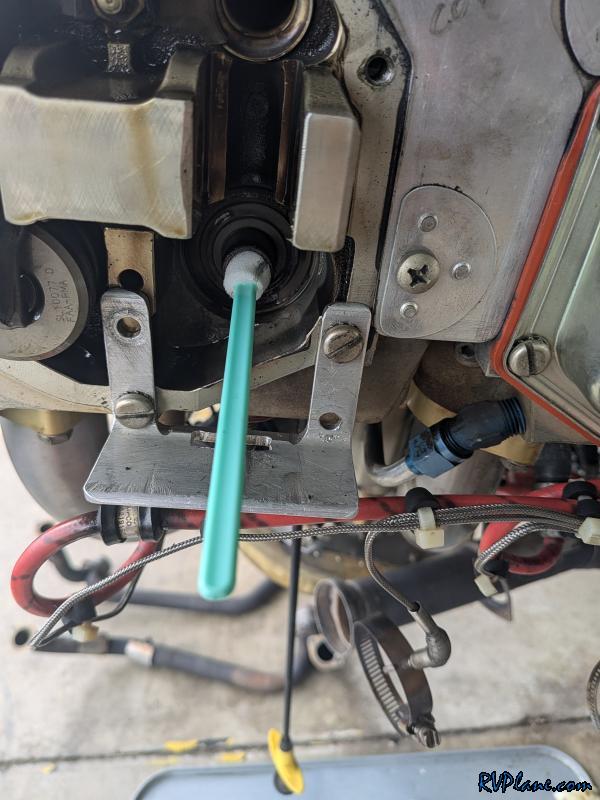 Here is a borescope picture from inside the guide. I dont quite know how to interpret it. The borescope, especially from this angle (and light!) tends to exaggerate things. I am just putting it out there for documentation for how mine looks. It may be useful in the future.  So this is the contraption I made to spin the exhaust valve to lap it. It's a 3/8" bolt I cut the head off of, attached to some 3/8" ID tubing, squeezed over the exhaust valve and secured with hose clamps. This worked OK as is. One issue is the valve would be tough to spin as it was grinding, which caused the short section of tubing to twist as it would give easily. I shortened the length between the end of the cut off bolt and the valve and that helped some, but having thicker walled tubing would have really helped here. The thicker the better! 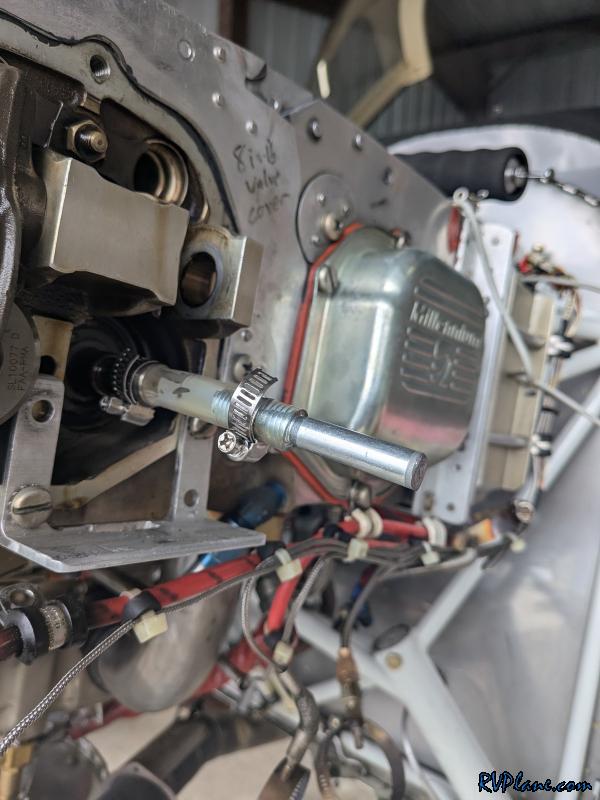 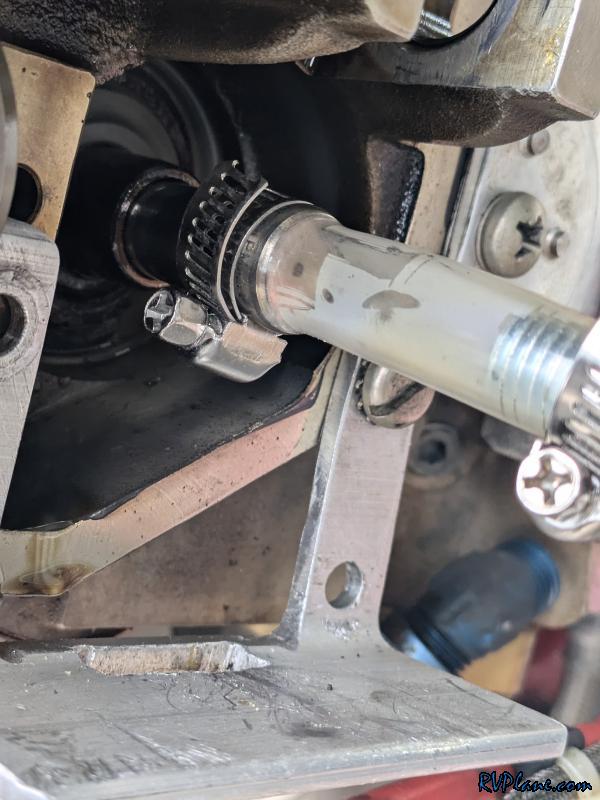 The tools of the job - Chemico Grinding paste and 5.1" foam cleaning swabs. The Grinding paste has two ends COURSE THIS END and FINE THIS END. Essentially two grits in one container. 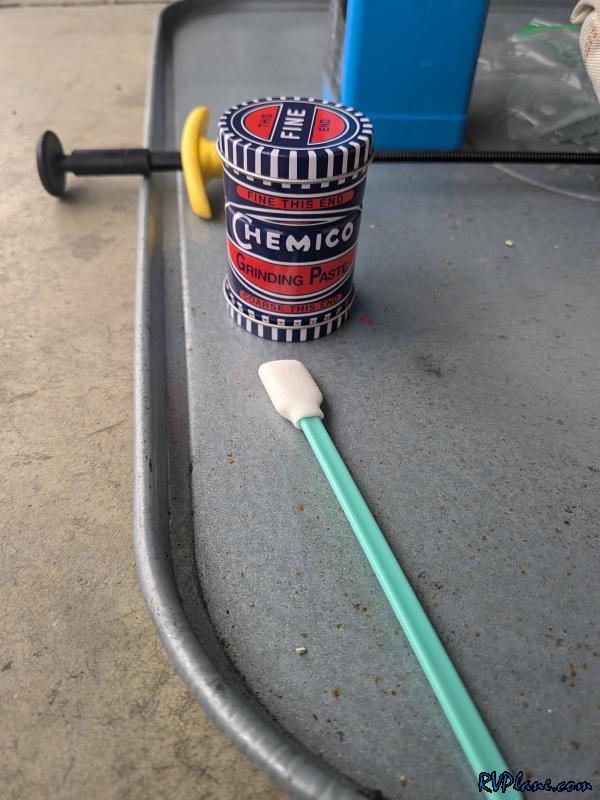 Here is a closeup of the course grinding paste. It's certainly very "sticky" as you can see from the picture. Reminded me of Vaseline with grit in it. 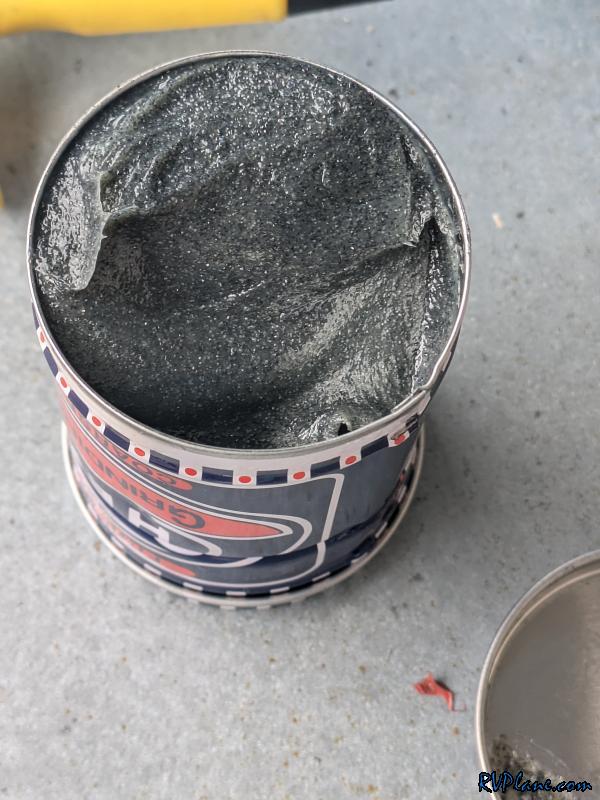 Hard to see here, but from the exhaust port you can see the mating edge of the valve to the head. You can spin the valve by hand while applying the grinding paste to it. 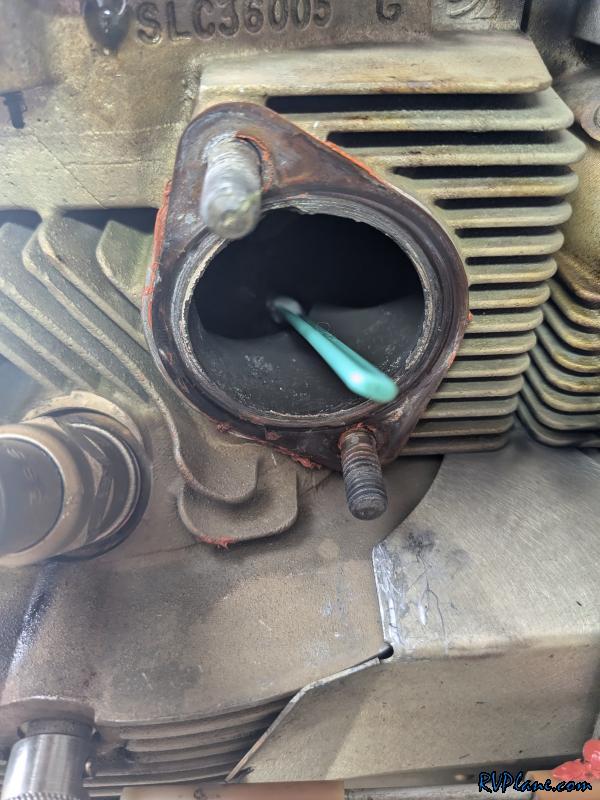 Another mediocre picture. I probably should have put the borescope in here for a better picture. Next time! 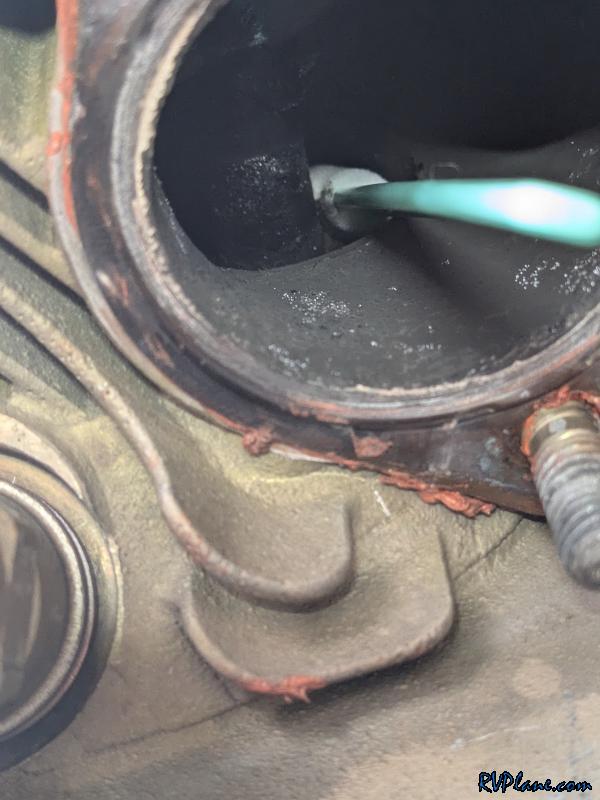 Here is where the magic really happens. I started with a coating of the coarse grinding paste, then ran the drill on the higher speed setting, varying the speed with the trigger. I did it for maybe 60 seconds. I unchucked the drill and spun the valve by hand and it seemed very smooth. Before it was certainly bound up by some friction due to the grinding paste on the valve. I used a swab to remove the course grinding paste and applied some fine grinding paste and spun the valve for another 1-2 minutes. This was followed by a thorough cleaning. I used the swabs without anything on it to remove any residue from the valve while spinning it. I would remove the swan, spin the valve on the cylinder, and then wipe it again. Once the swabs were clean, I put acetone on the swab and spun the valve against it, once again repeating until clean. Finally, I put some oil on the valve lip. I did this to suspend any grinding paste that I may not have captured, in hopes when the engine started it would blow out the exhaust port. 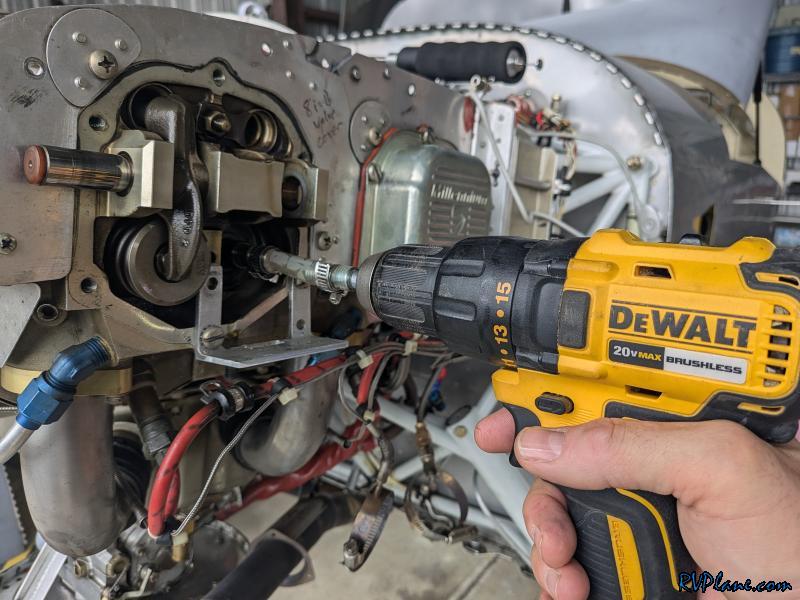 Now the true test. Remember before all of this, I blowing air past the exhaust valve at a really good rate. Now - Nothing. I spun the valve between tests, still good. And this test is with the engine cold, piston at the bottom of the stroke - so it's not a real 73/80. But that's enough to tell me the valve is much happier. 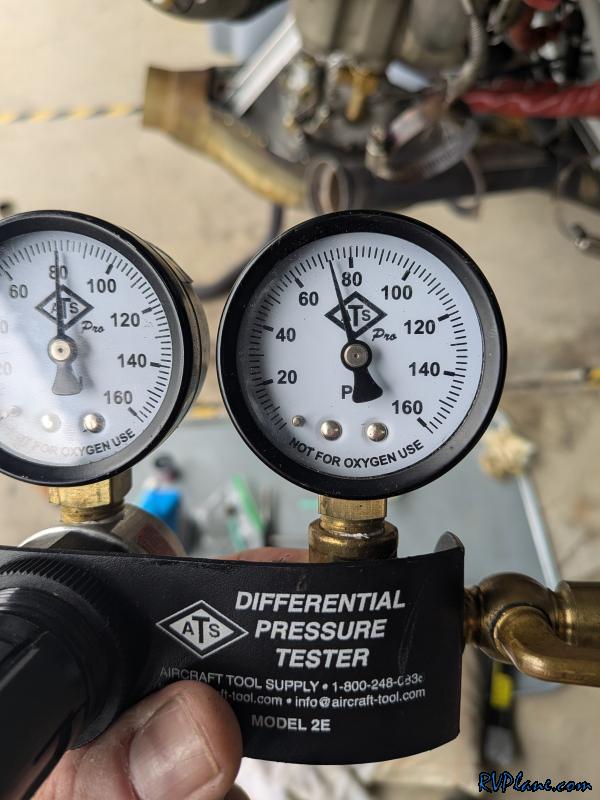 What good would this repair be without after pictures of the valve lapping? I wanted to look inside the cylinder one last time mainly to look for any grinding compound that may have been left behind. I also wanted to look at the mating surfaces of the valve the the cylinder. The cylinder mating surface looks much better than the original picture. 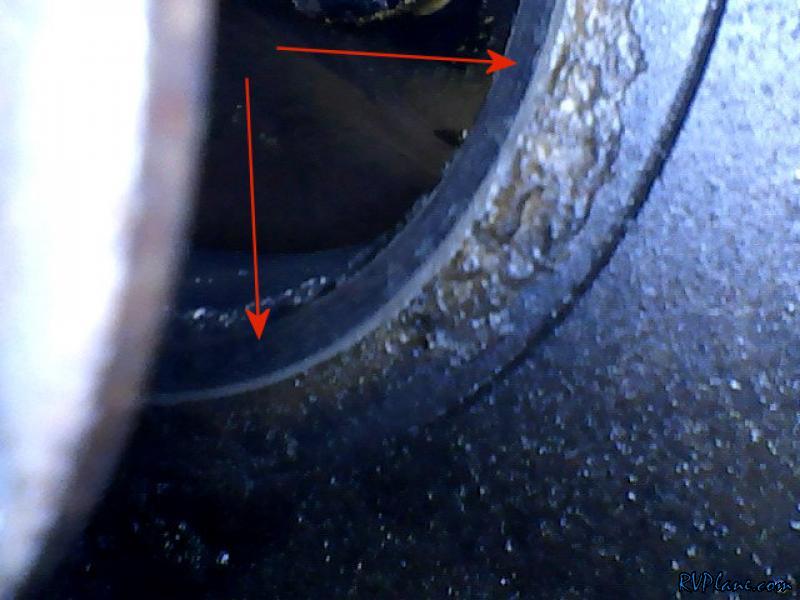 You can also clearly see on the valve how clean the interfacing surface is. I think all that is left to do is go fly and test it out! 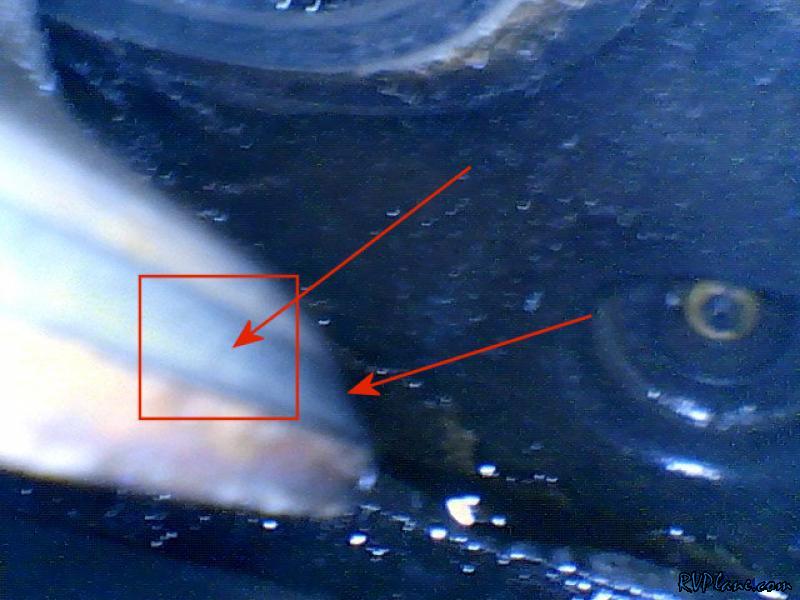 My #1 cylinder has been running hot. A few months ago I trimmed down the from baffle, now I just wanted to remove it. Since the cowl and plenum were off, it was a good time to remove it.  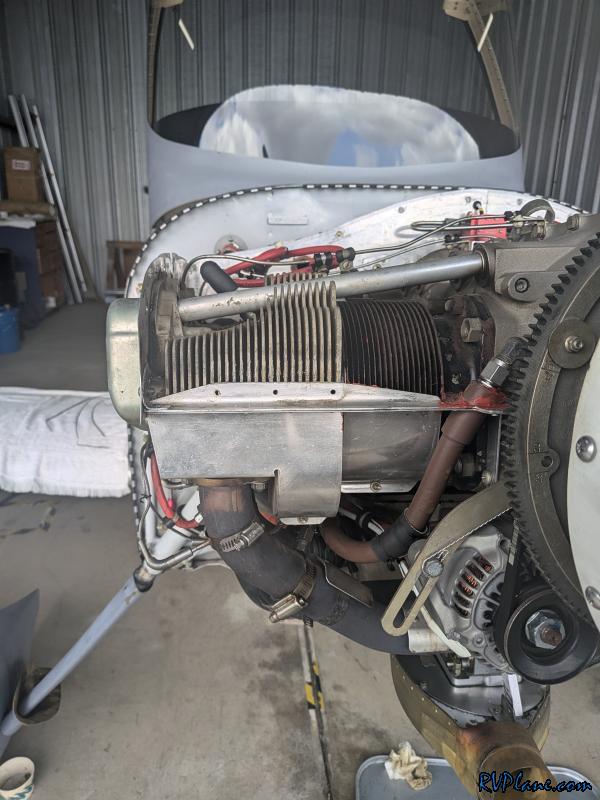 I flew a quick lap in the pattern to make sure the engine performed as expected and I wasn't too far from the airport. CHT's were what I was looking for - consistent with each other! The engine ran really good and strong, I didn't notice any hesitation or abnormal operation. After I landed, I performed another run up, looked at all of the temperatures and went for a short flight around the area. 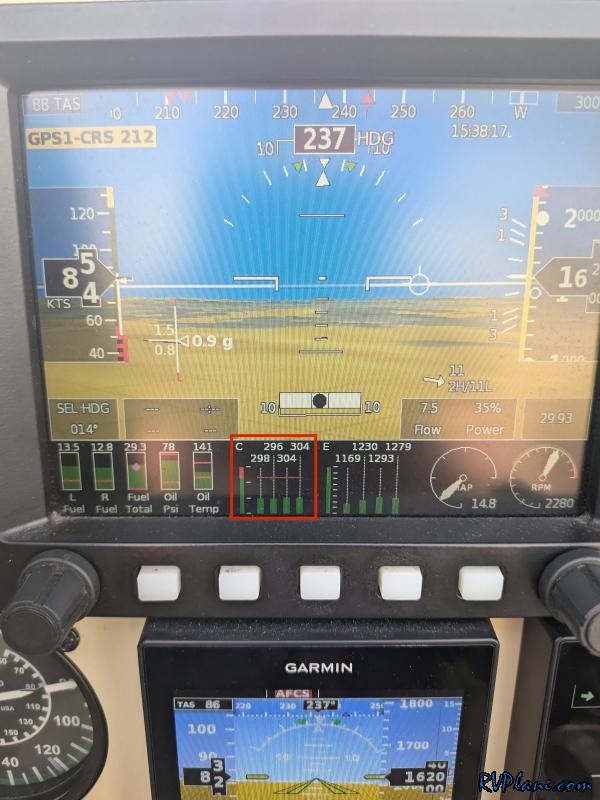 After 30 or so minutes into flight the CHT's were reasonably close to each other and the engine was still running strong. A great successful repair! 
|
|||||
|
http://RVplane.com |
Last Modified: January 31, 2026 |