
|
 |
||||
Today I got a lot done. When I got to work, I looked at the primed pieces and they really turned out nice. I had some slight variance on application layer and a few drips on my bars, but thats it. Nothing too bad. I have been fighting a cold all week, so I skipped out of work early to get some rest. When I got home I started to feel better after a while, so I went and worked on old RV! The first thing I did was try to see if I could find my part markings that I engraved in. It took a while, but under the right light all of them could be seen. I marked everything with L's and R's with a sharpie so I wouldn't have to go through finding the etches again. Another thing I did was keep all the parts together for the right/left during the priming process. That way if I couldn't find some markings, I could have a good idea where they went. I got the rear spars and bars riveted first. One thing I didn't do was mark off where the angle brackets attach to the bars. I accidentally riveted these suckers without the brackets on one side of the assembly. So I got my #30 drill bit out and drilled it out. The rivet came out super easy without any harm. I really needed today to go smoothly after how much of a pain it was priming yesterday. One thing that I changes was Van's calls for a AN470AD4-5 rivet HS-413PP bracket. I put the rivet in and it looked WAY to long, so I used a AN470AD4-4 in its place. This fit perfectly. Also, I took the bearing bracket assembly and drilled out one of the rivets on that because it was too short and slanted. Next I moved onto the front spars and pretty much went with the flow. I tried to put all of the shop heads in the same direction, based on the flush head rivet for the part of the spar that is outside of the skin. The rivets on the inside of the skin were easier to rivet going the other way. To each there own on this one. I just liked the way it looked. Next I riveted the HS-404 and HS-405 ribs onto the front spar. Nothing too complex about this. I used a hand squeezer for these since it was too late to use the air compressor. Finally I started deburring the edges of the skins. This took some playing with on the bottom side to get the best technique to do the least about of scratching. I used the speed deburring tool (the one with a V shaped head) a couple times first. Then I took a small piece of emery cloth to smooth everything out. Finally, I used a scotchbrite pad to give it a once-over. Very smooth, very deburred, very little alclad scratching (nothing that can't be buffed out!). Everything on the rear spar clecoed together for the last time. You can see where I missed marking off one of the brackers on the bars.  Here you can really see where I messed up. The tape on the left side is where the bracket goes. On the right side, we have a problem. 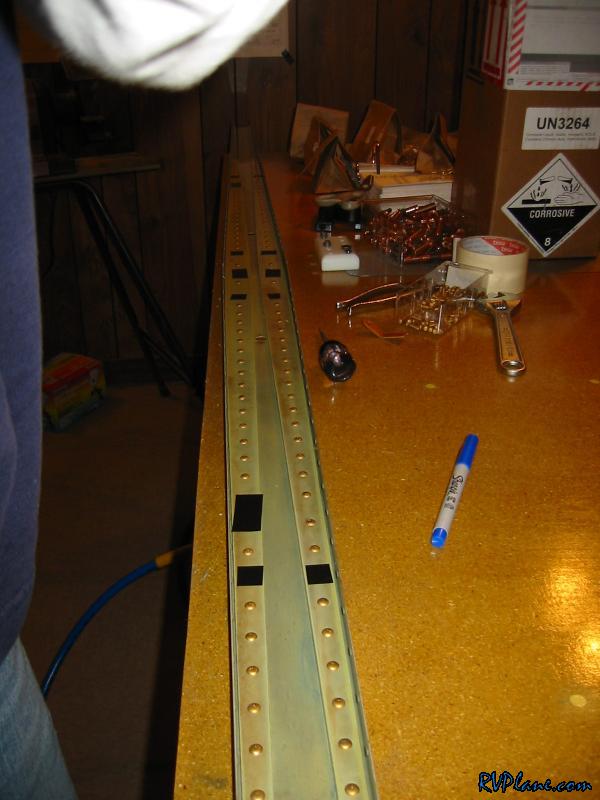 Yeah, like I need to see another view of my screwup. I don't even know why I took 2 pics of the same issue. 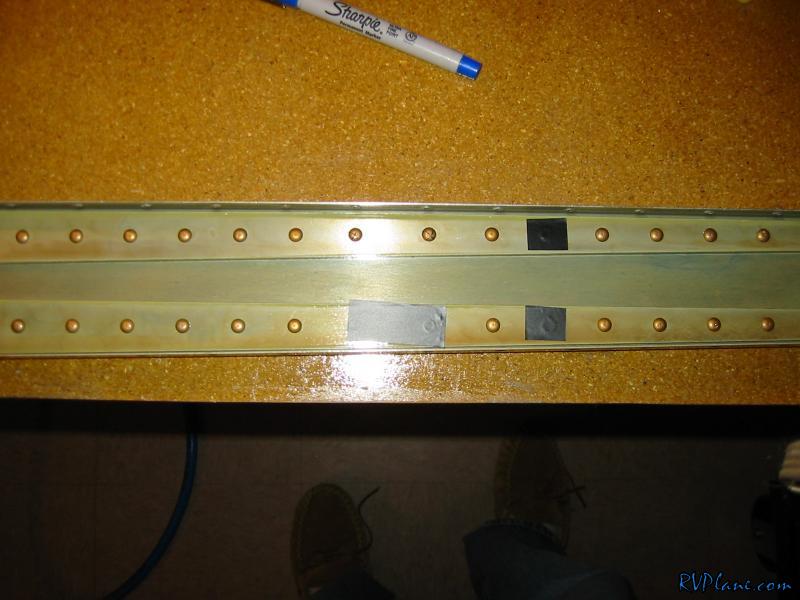 Here is where the HS-413 bracket attaches to the spar. On the left hand side is the Van's recommended AN470AD4-5, and the right is what I used, the AN470AD4-4. The 4-4 really worked well. Now I am not telling you to do this, but this is what I thought was right. 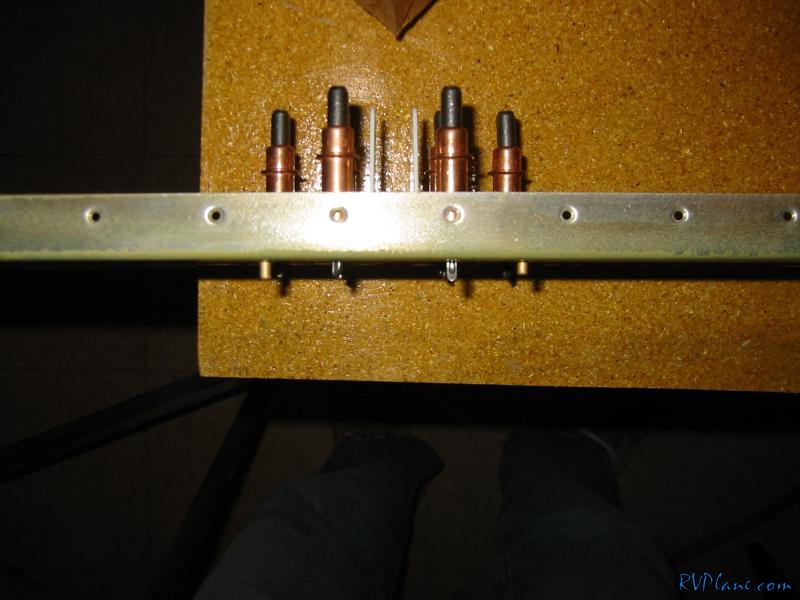 Everything riveted on the rear spar. Man this looks cool! 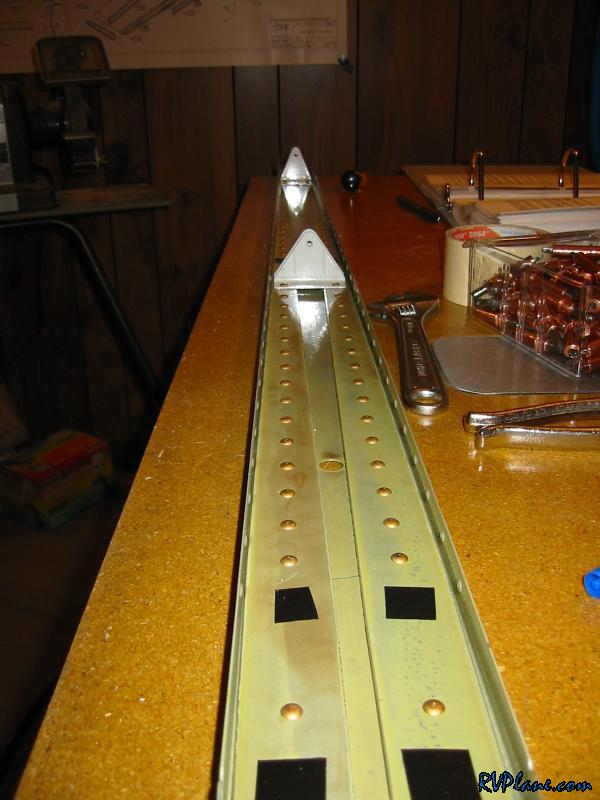 The front spar, marked off. 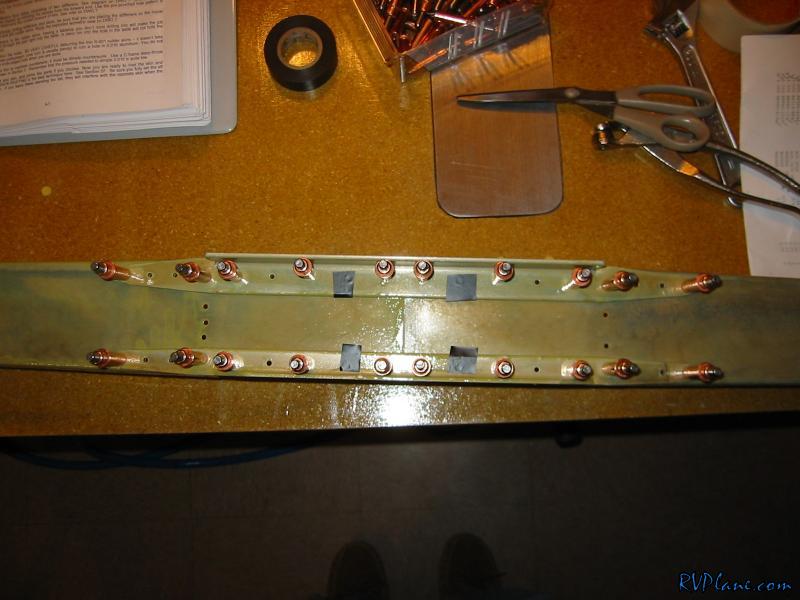 Oh wait, I almost screwed up again. I forgot that the rear rib attches there. 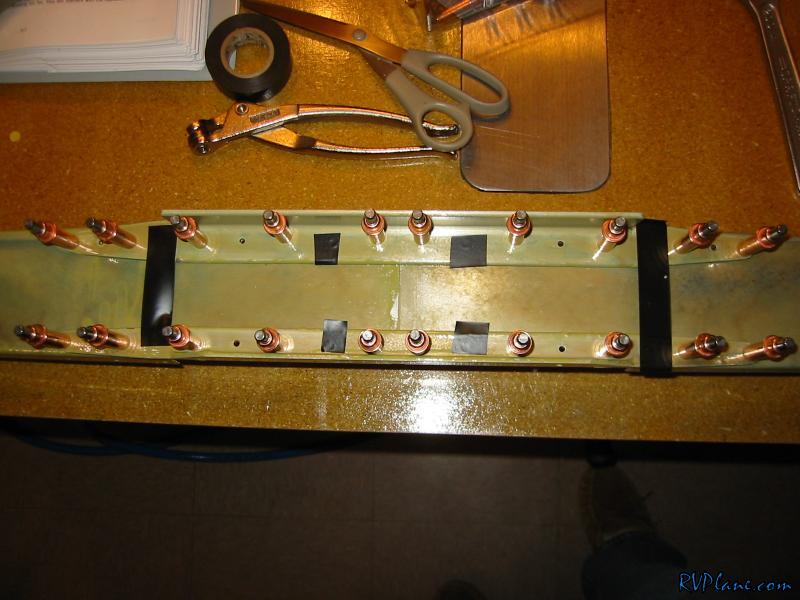 Everything riveted. Noticed what rivets I put up and down. Some were for convienence, others for aestetics. 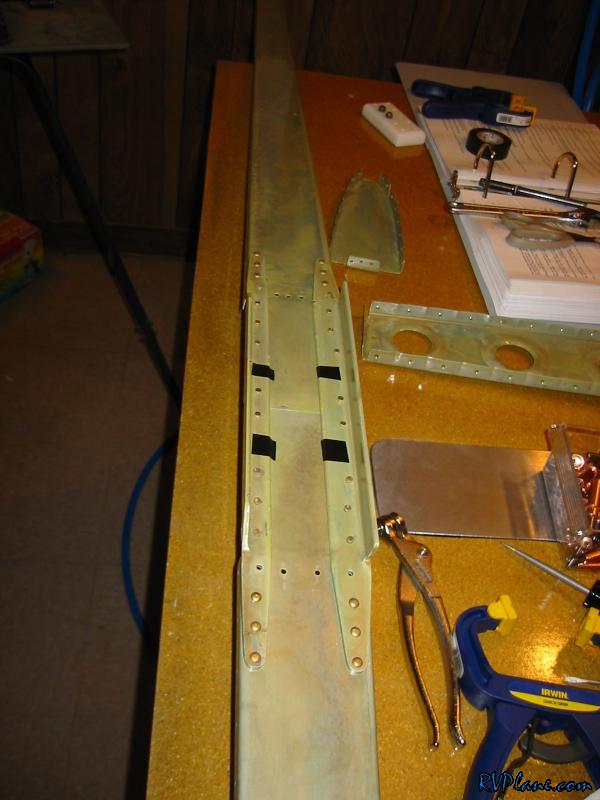 Another shot. 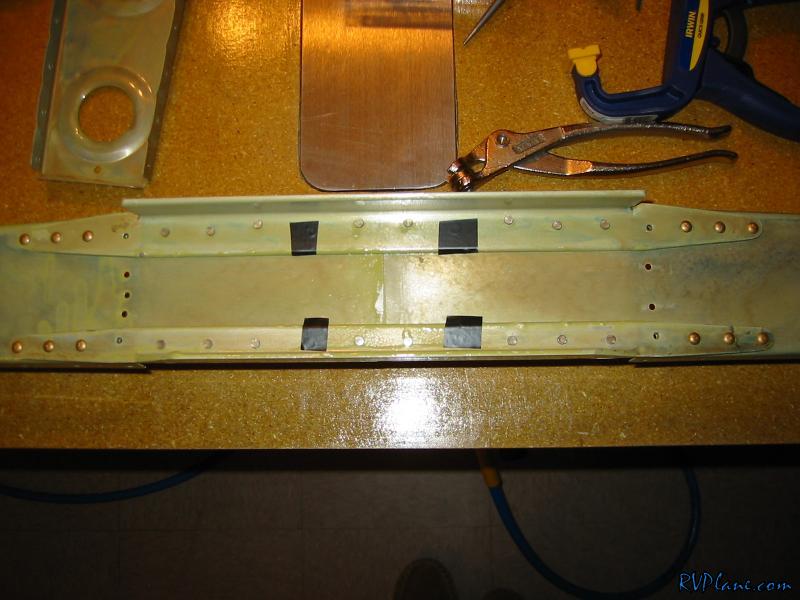 the HS-404 and 405 ribs attached! 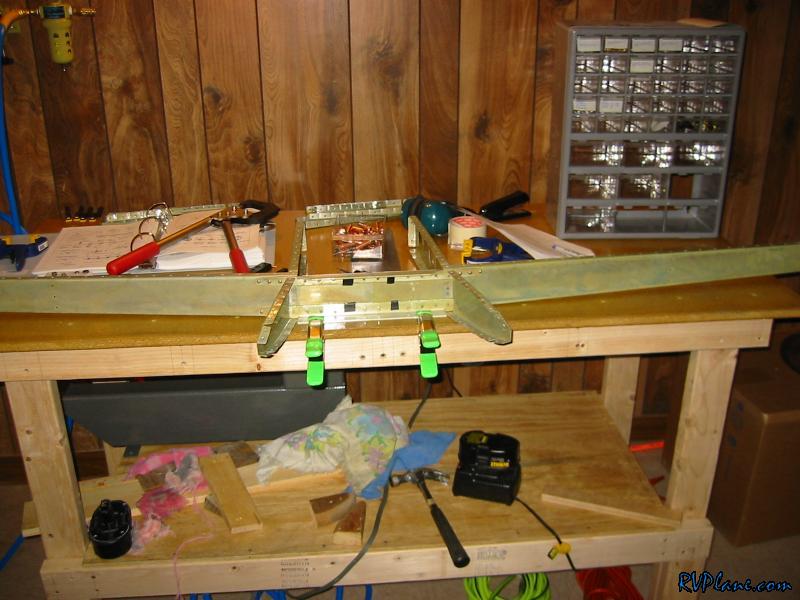 Nice rivets, heads all going in the same direction! I did this for two reasons. First, it looked cool. Secondly, when I used the 90 degress angle drill adapter, the holes were a tad on the oblong side on only the rib where the drill met. I was still 'mastering' the right angle drilling technique. Anyways, I wanted the large shop head to be on the side of the enlarged hole to provide maximum coverage. Not that it really matters, but it was important to me. 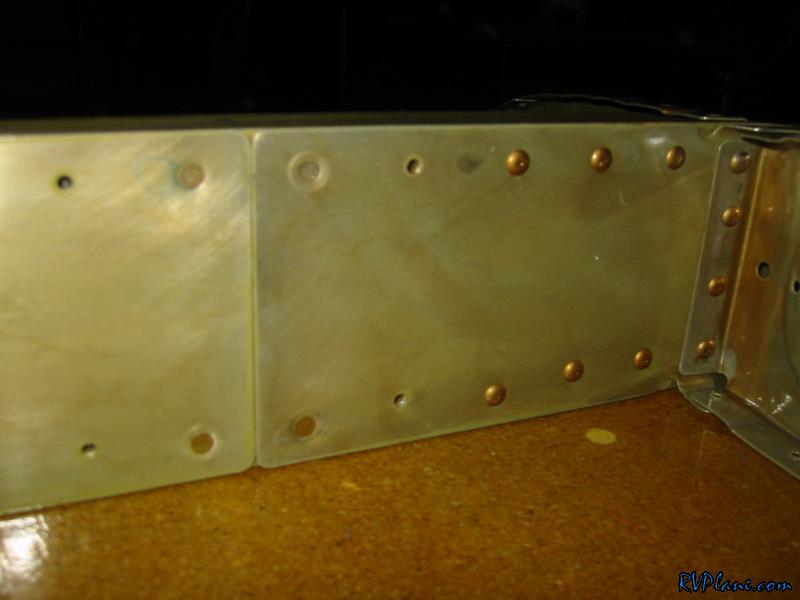 This is starting to look cool. Time to skin this cat! 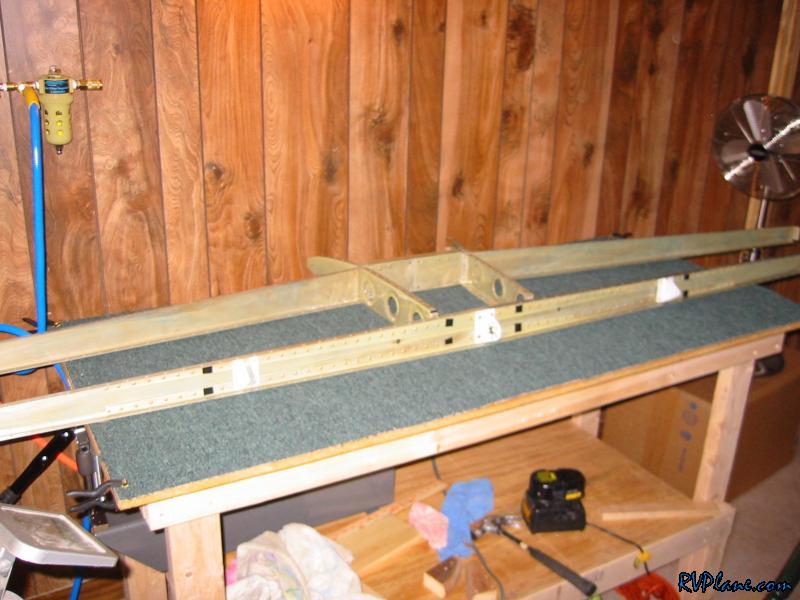
|
|||||
|
http://RVplane.com |
Last Modified: June 22, 2025 |